
Institutions that are using Stellic's appointment scheduling module are able to set up an option to allow students to schedule appointments within the Stellic platform. This module may not be available for your institution - please contact your institution's Stellic administrator for more information.
To begin, select the "Appointments" tab from the top navigation bar or left sidebar menu. If you have never used appointment scheduling, students will not be able to schedule appointments with you (or vice versa) until you have created and activated at least one time block. Students can only schedule appointments with admins that meet two criteria:
- The admin has the ability to view that student within Stellic.
- The admin has created and published a time block where the student is eligible to schedule.
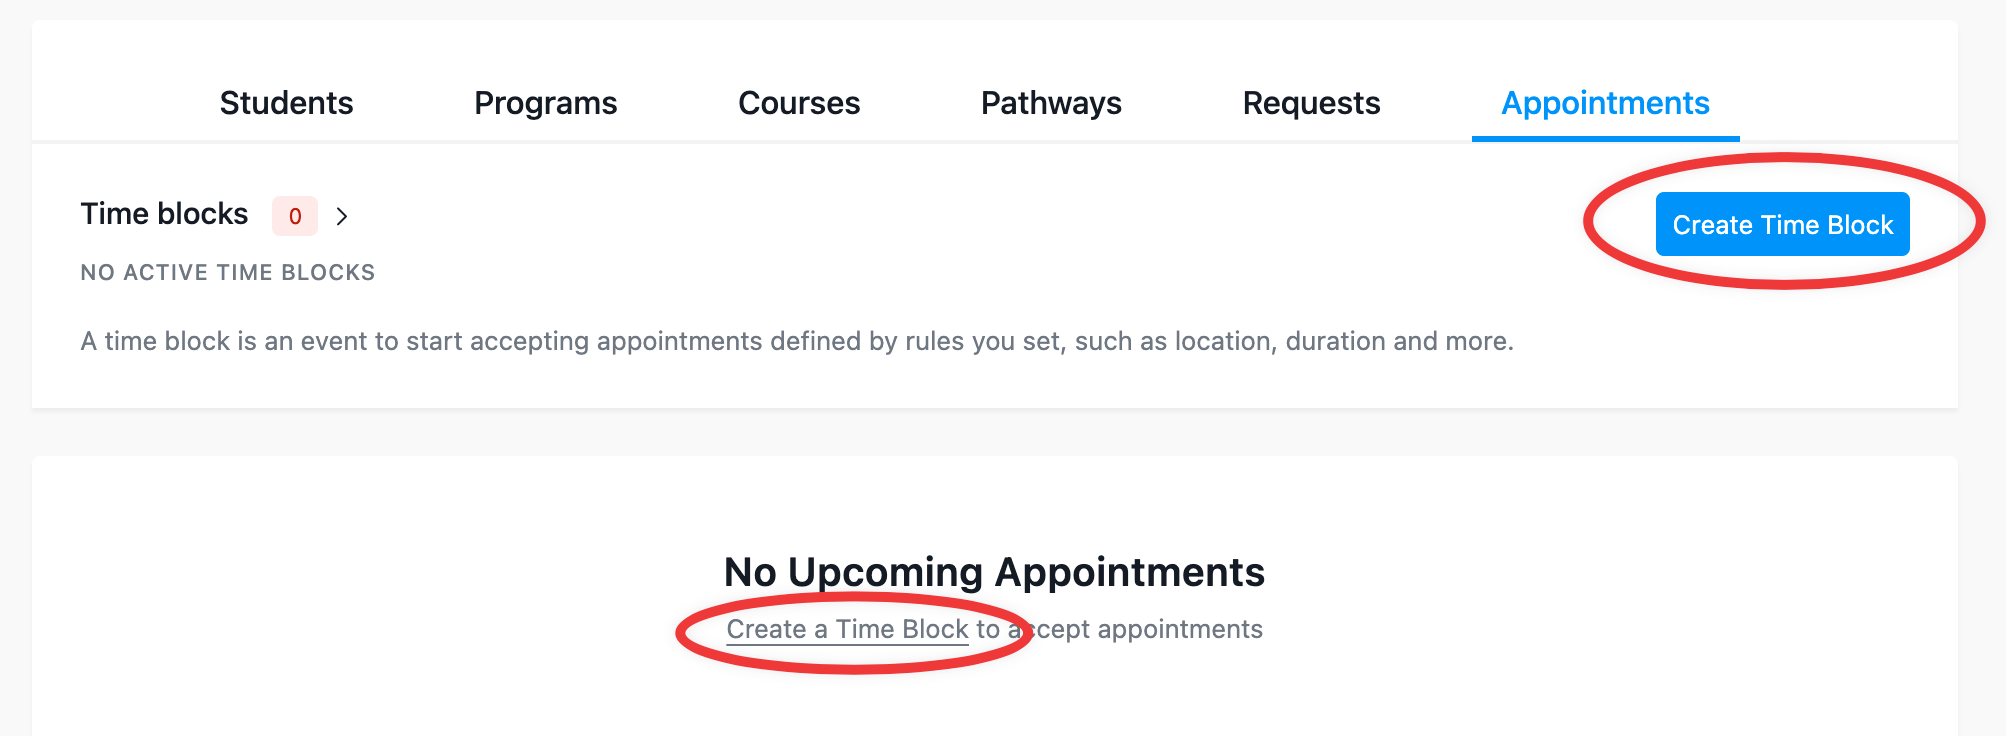
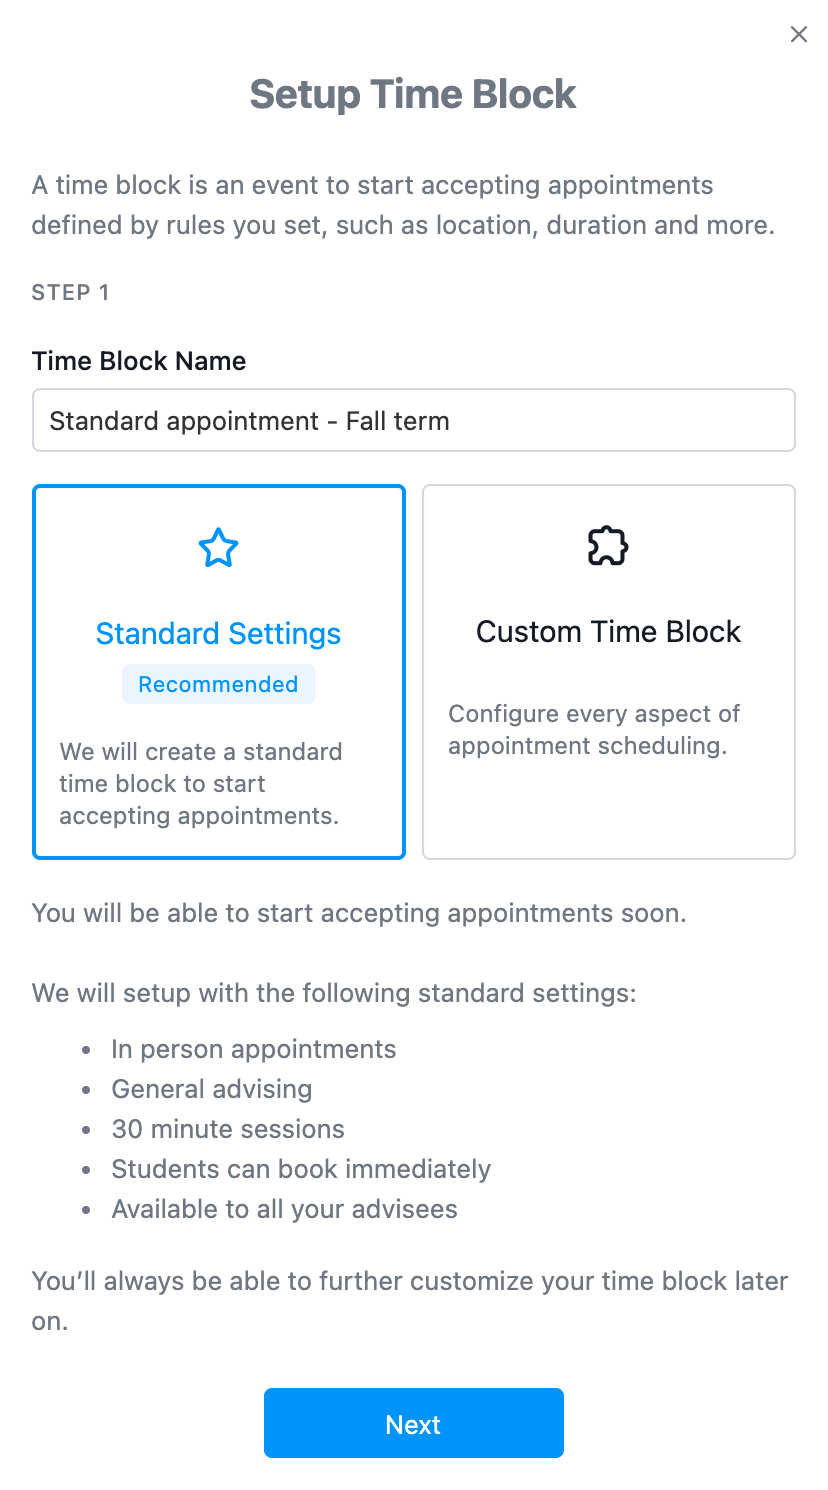
Click on "Create Time Block" to continue. A time block defines the rules of the appointment that is able to be scheduled. You will need to name your time block and decide on the settings. Clicking on "Standard Settings" creates a time block with some default settings for things like meeting location, type of meeting, length of meeting, etc. that can later be customized.
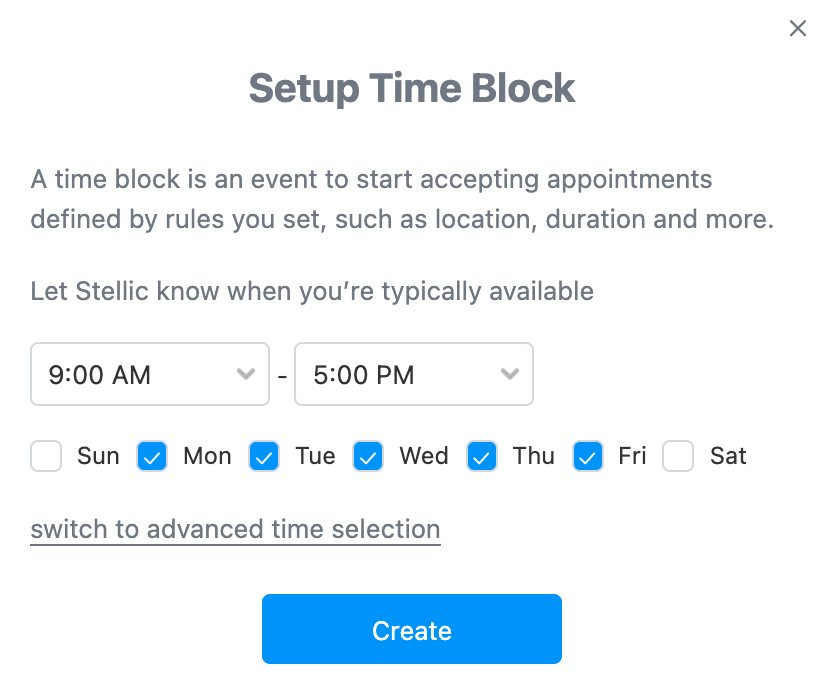
Once you have determined your settings, you'll need to establish what days and times you want to have appointments. Only days and times that you select will be available for scheduling - times that fall outside of these windows will not show as available.
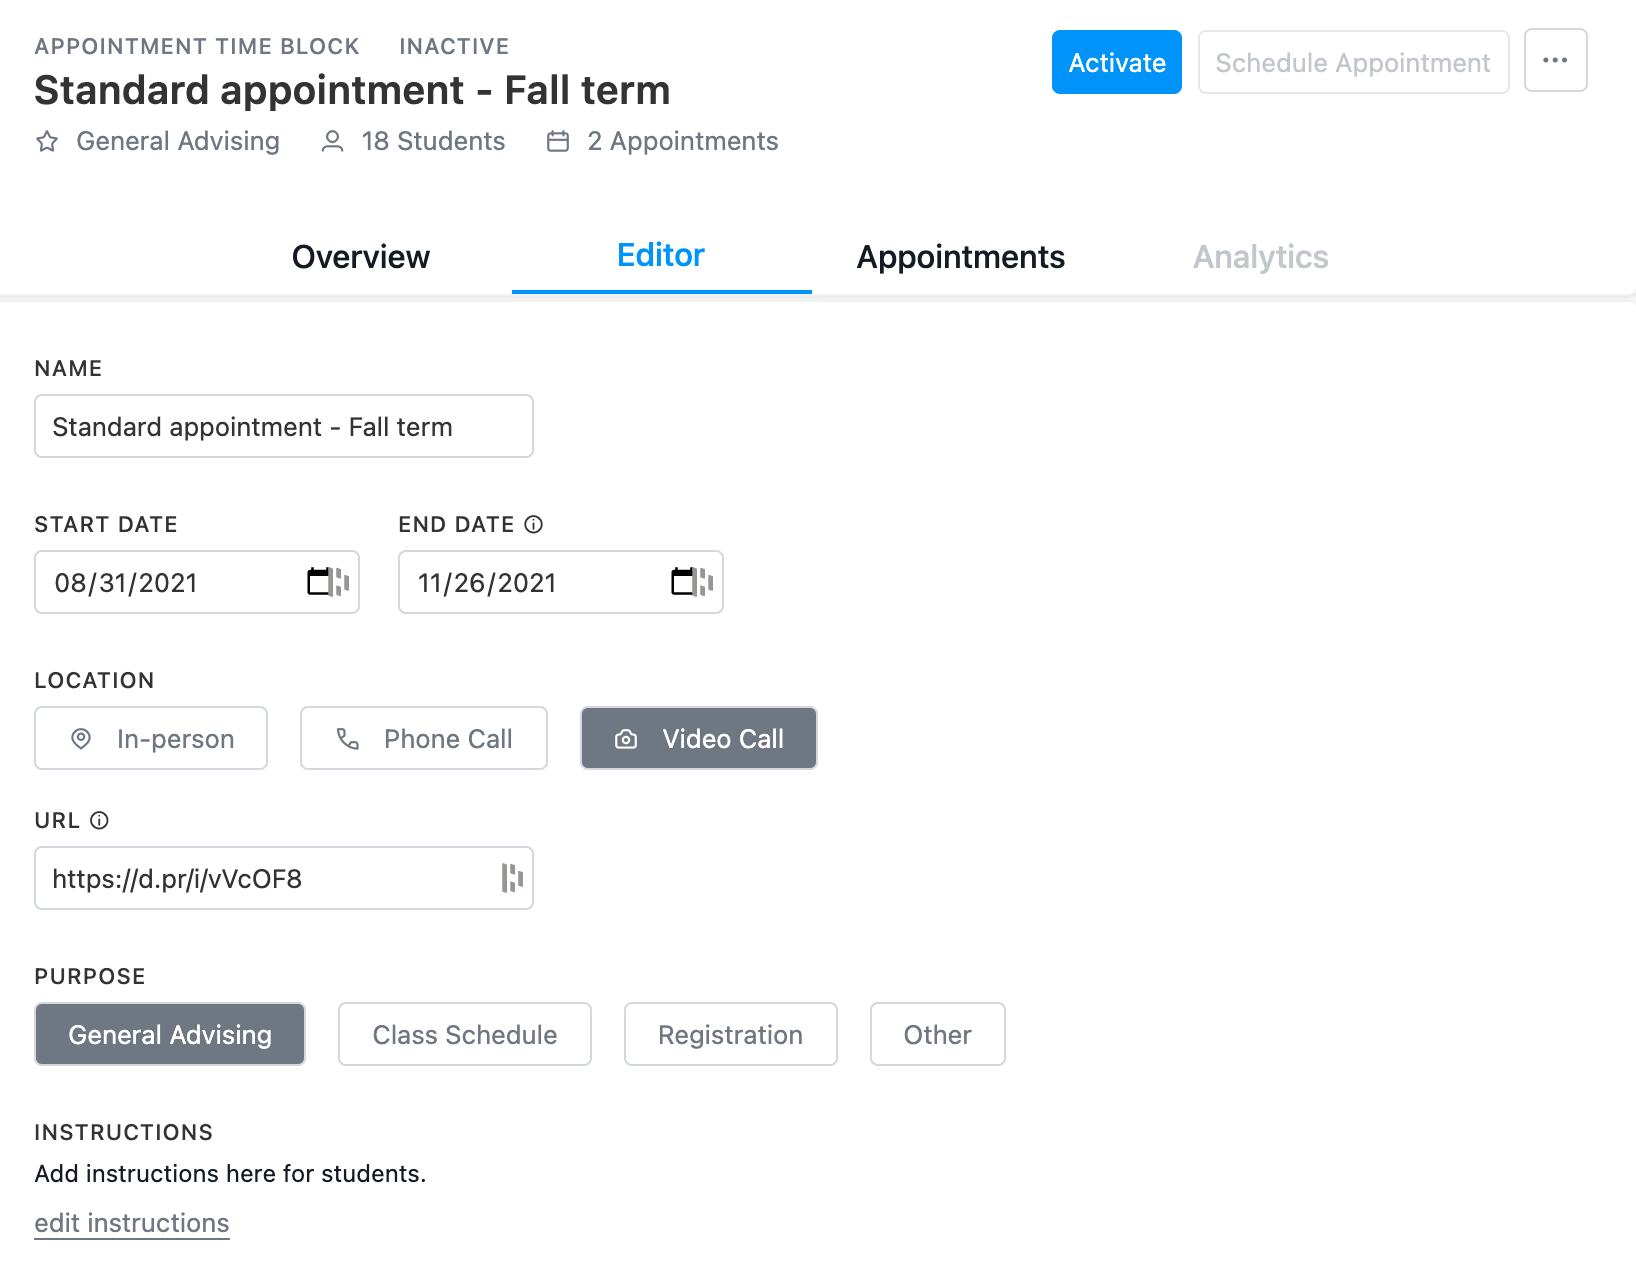
Once you click the "Create" button, you will be taken to an overview of your appointment time block. If you would like to change the settings of your time block, click on "Editor".
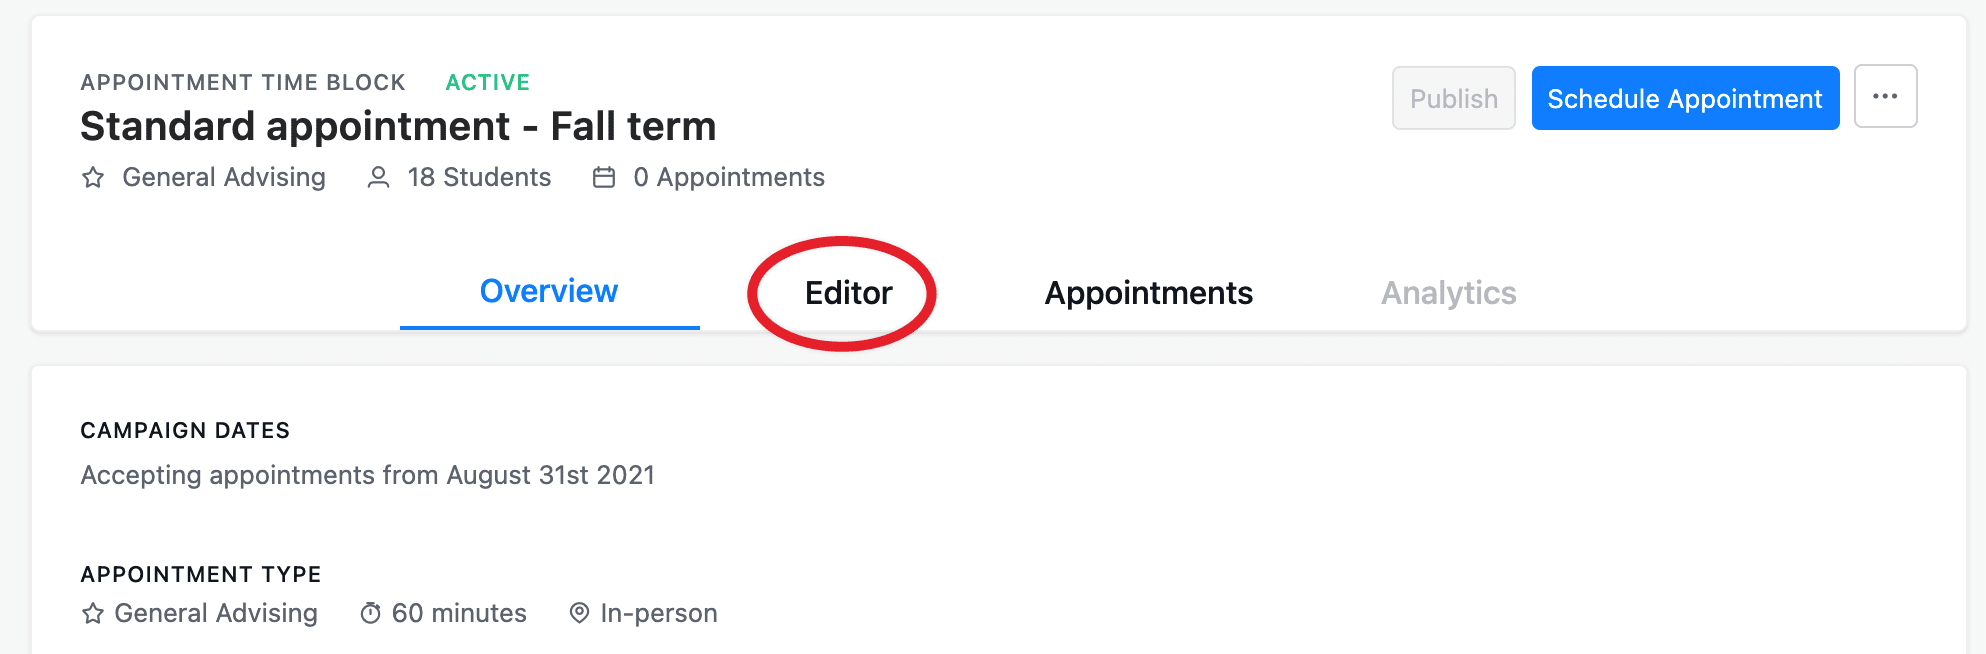
Within the time block editor, you can change the name, start and/or end date, location, purpose, and duration of the time blocks. You can also add instructions that will be visible to students when they schedule the appointment. Any changes that you make to the time block within the editor will be saved automatically.
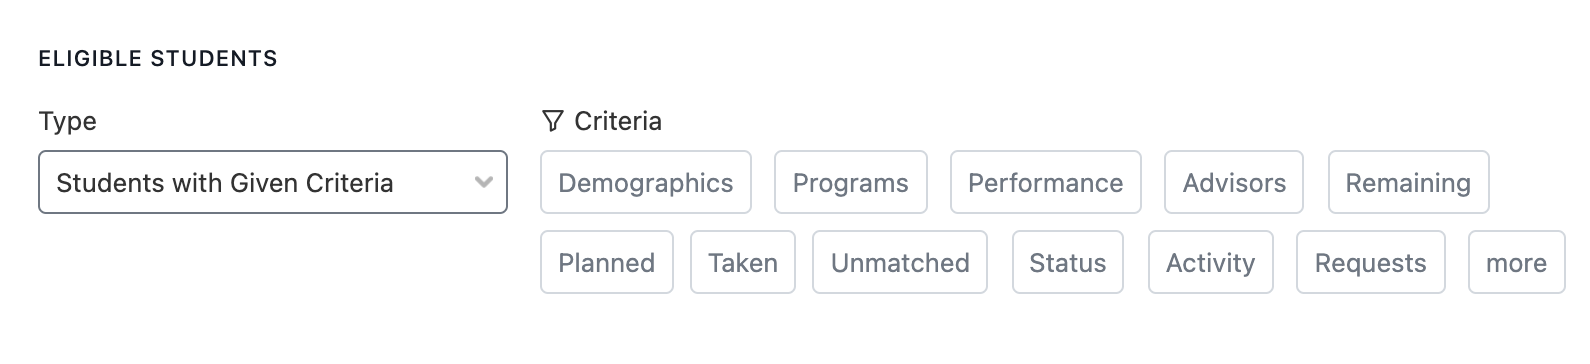
Important: In order for students to schedule an appointment within this time block, they must meet the eligibility set in the "Eligible Students" section. By default, this is set to "All Students" - meaning, all students that you have the permission to see in Stellic. If there are students at your institution that you are not able to see in Stellic, they will not be able to schedule an appointment with you.
You are also able to allow students that only meet specific criteria to schedule an appointment using the provided filters, or add a list of student usernames that can schedule an appointment with this time block.
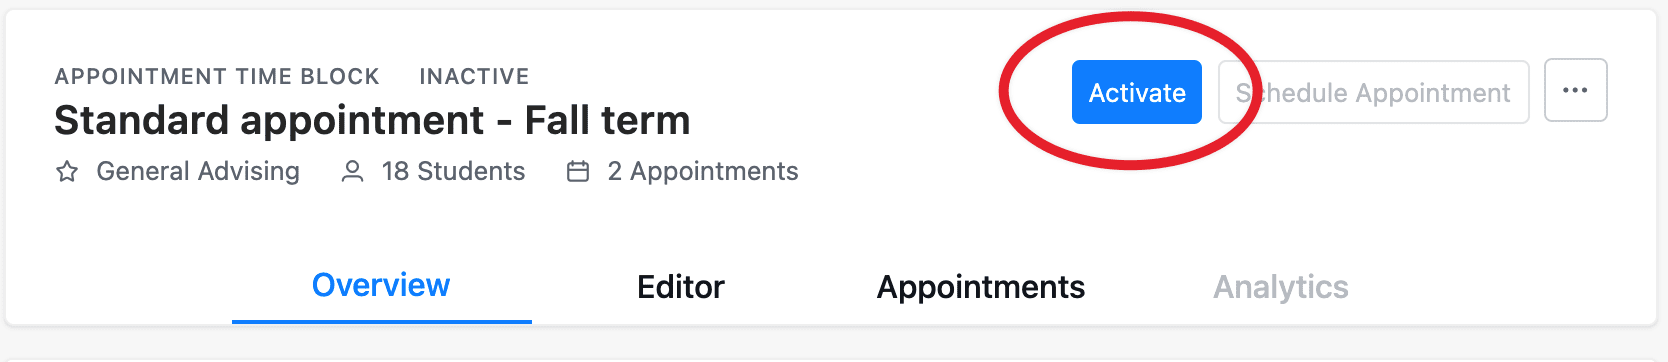
Finally, once you are ready to accept appointments, ensure that your time block is activated. Setting up a time block with standard settings will automatically activate - if you are not ready to schedule appointments, click on the three-dot menu to deactivate the time block. Setting up a time block with custom settings requires you to manually activate the block once you are done with your settings.
While it is possible to deactivate time blocks, it is not currently possible to delete time blocks once created.