Your institution may support a process known as pre-registration, which is where you are able to indicate your course and section preferences prior to the official registration for an upcoming term. This article will walk you through the steps of pre-registering for courses.
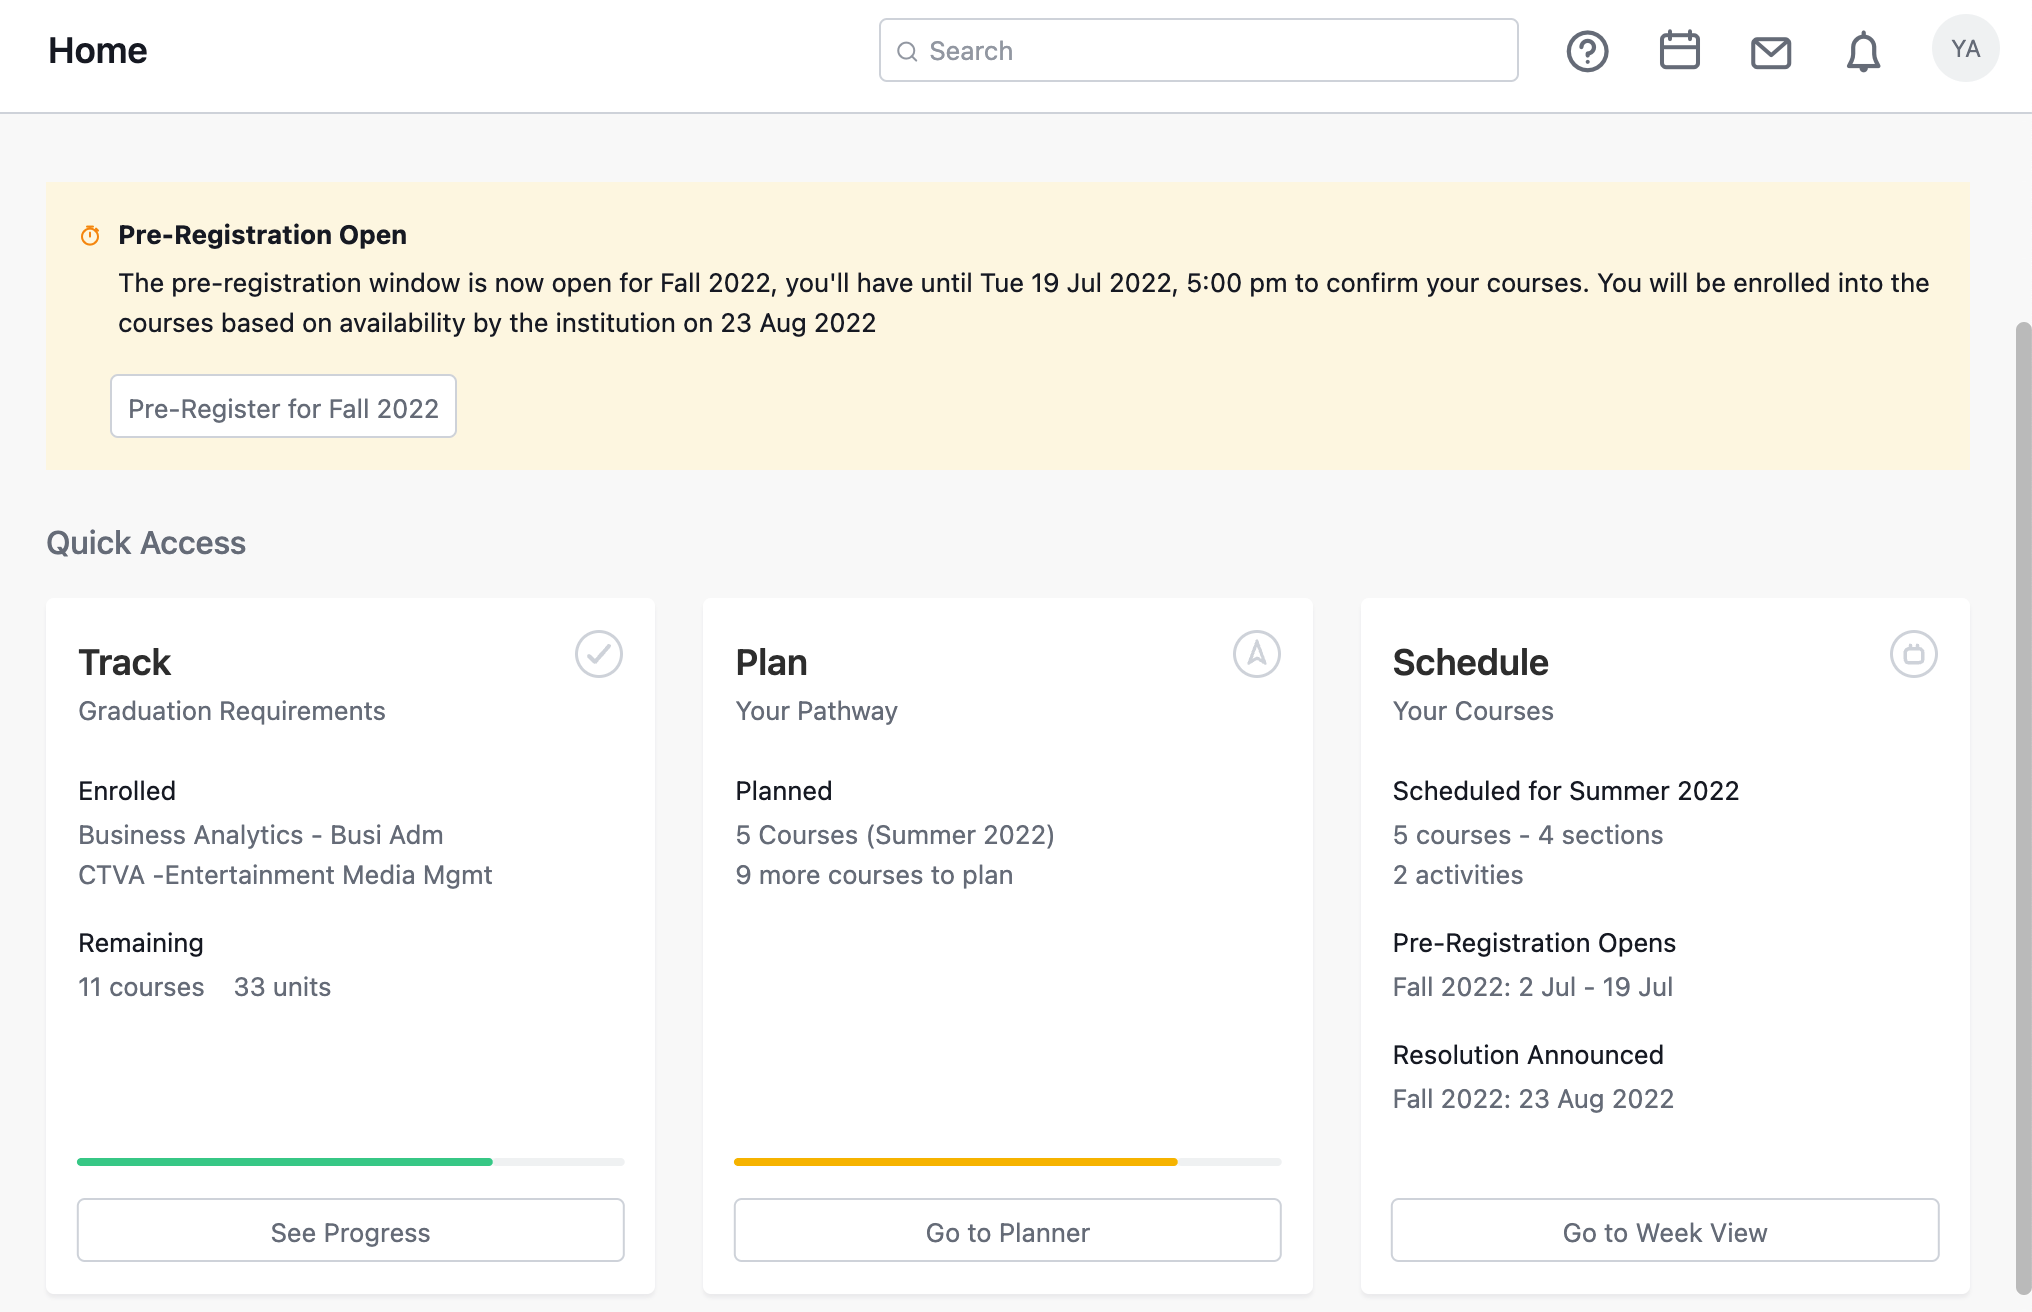
Stellic will let you know if and when pre-registration is available. When logging in, if you are eligible for pre-registration you will see a banner displayed on your Stellic homepage.
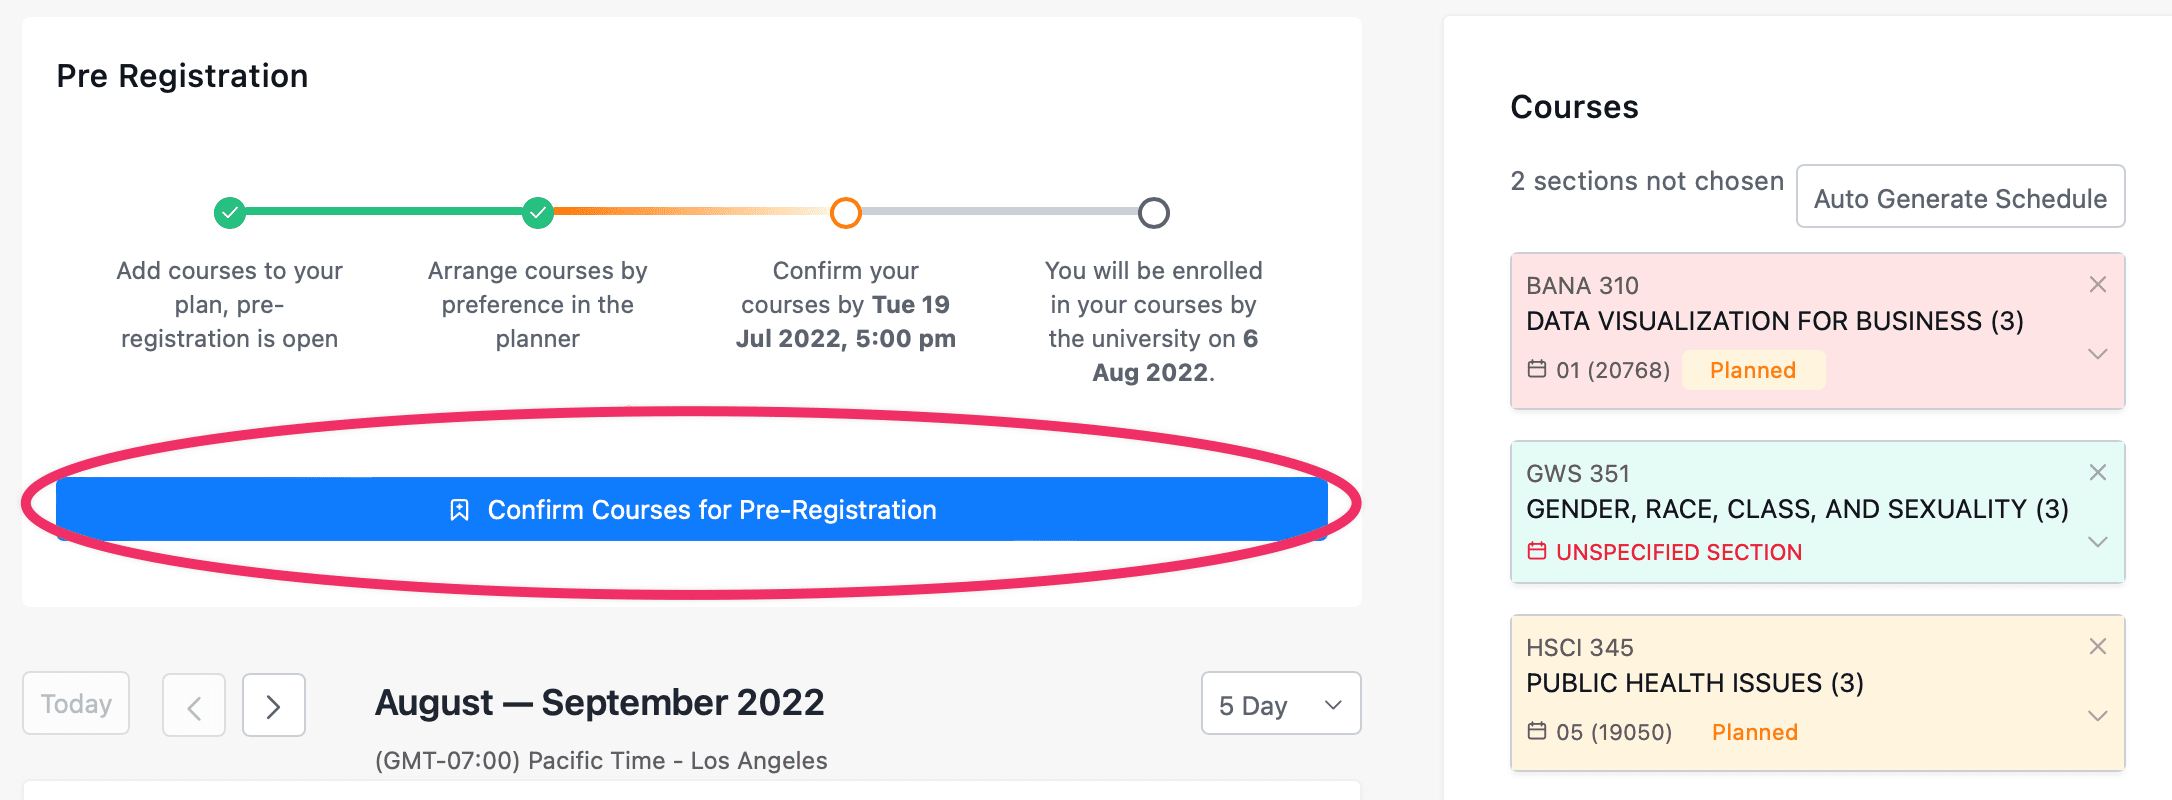
There will also be a message available within your planner that displays at the top of any term where pre-registration is available:

Both of these messages will take you directly to the widget where you can rank your courses for pre-registration. If you have not already done so, you should first visit your planner or schedule view, where you can add courses to your plan for pre-registration. We've also outlined some steps at the very bottom of this article on prepping for pre-registration. If you have already added courses to your plan, proceed directly below to steps for pre-registration!
Steps for pre-registration
1. You will need to indicate the priority order of the courses (assign them a "rank" of how much you would like to take that course) that you're interested in taking. You may list more courses than you're able to actually able to register for - your institution will take your choices into account when making registration selections, and let you know which courses weren't able to be chosen. You can list up to ten courses in your pre-registration list.
To rank courses, drag them from the left side of the page into the right, or click on the button to add all courses. You can drag and drop courses to rank them accordingly, with the top of the page indicating your highest level of interest in taking the course, and the bottom of the page indicating your lowest level of interest in taking the course. You can also click on the number of the course and change its priority instead of dragging and dropping it within the list. 
2. You can remove courses by either dragging them from the right side of the page back to the left, or by clicking on the small "x" that appears on the right side of the page next to the courses in your pre-registration cart. [NOTE: To entirely remove a course from your plan, you must go back to your Planner and remove the course by clicking on the x in the top right corner of the course].
3. Once you have arranged your courses in the way you would like, click on the "Save and Submit Pre-Registration" button at the bottom of the page. This will solidify your pre-registration preferences for your institution. You will be able to return to the widget and "Save and Submit Pre-Registration" as often as you like during the pre-registration window. 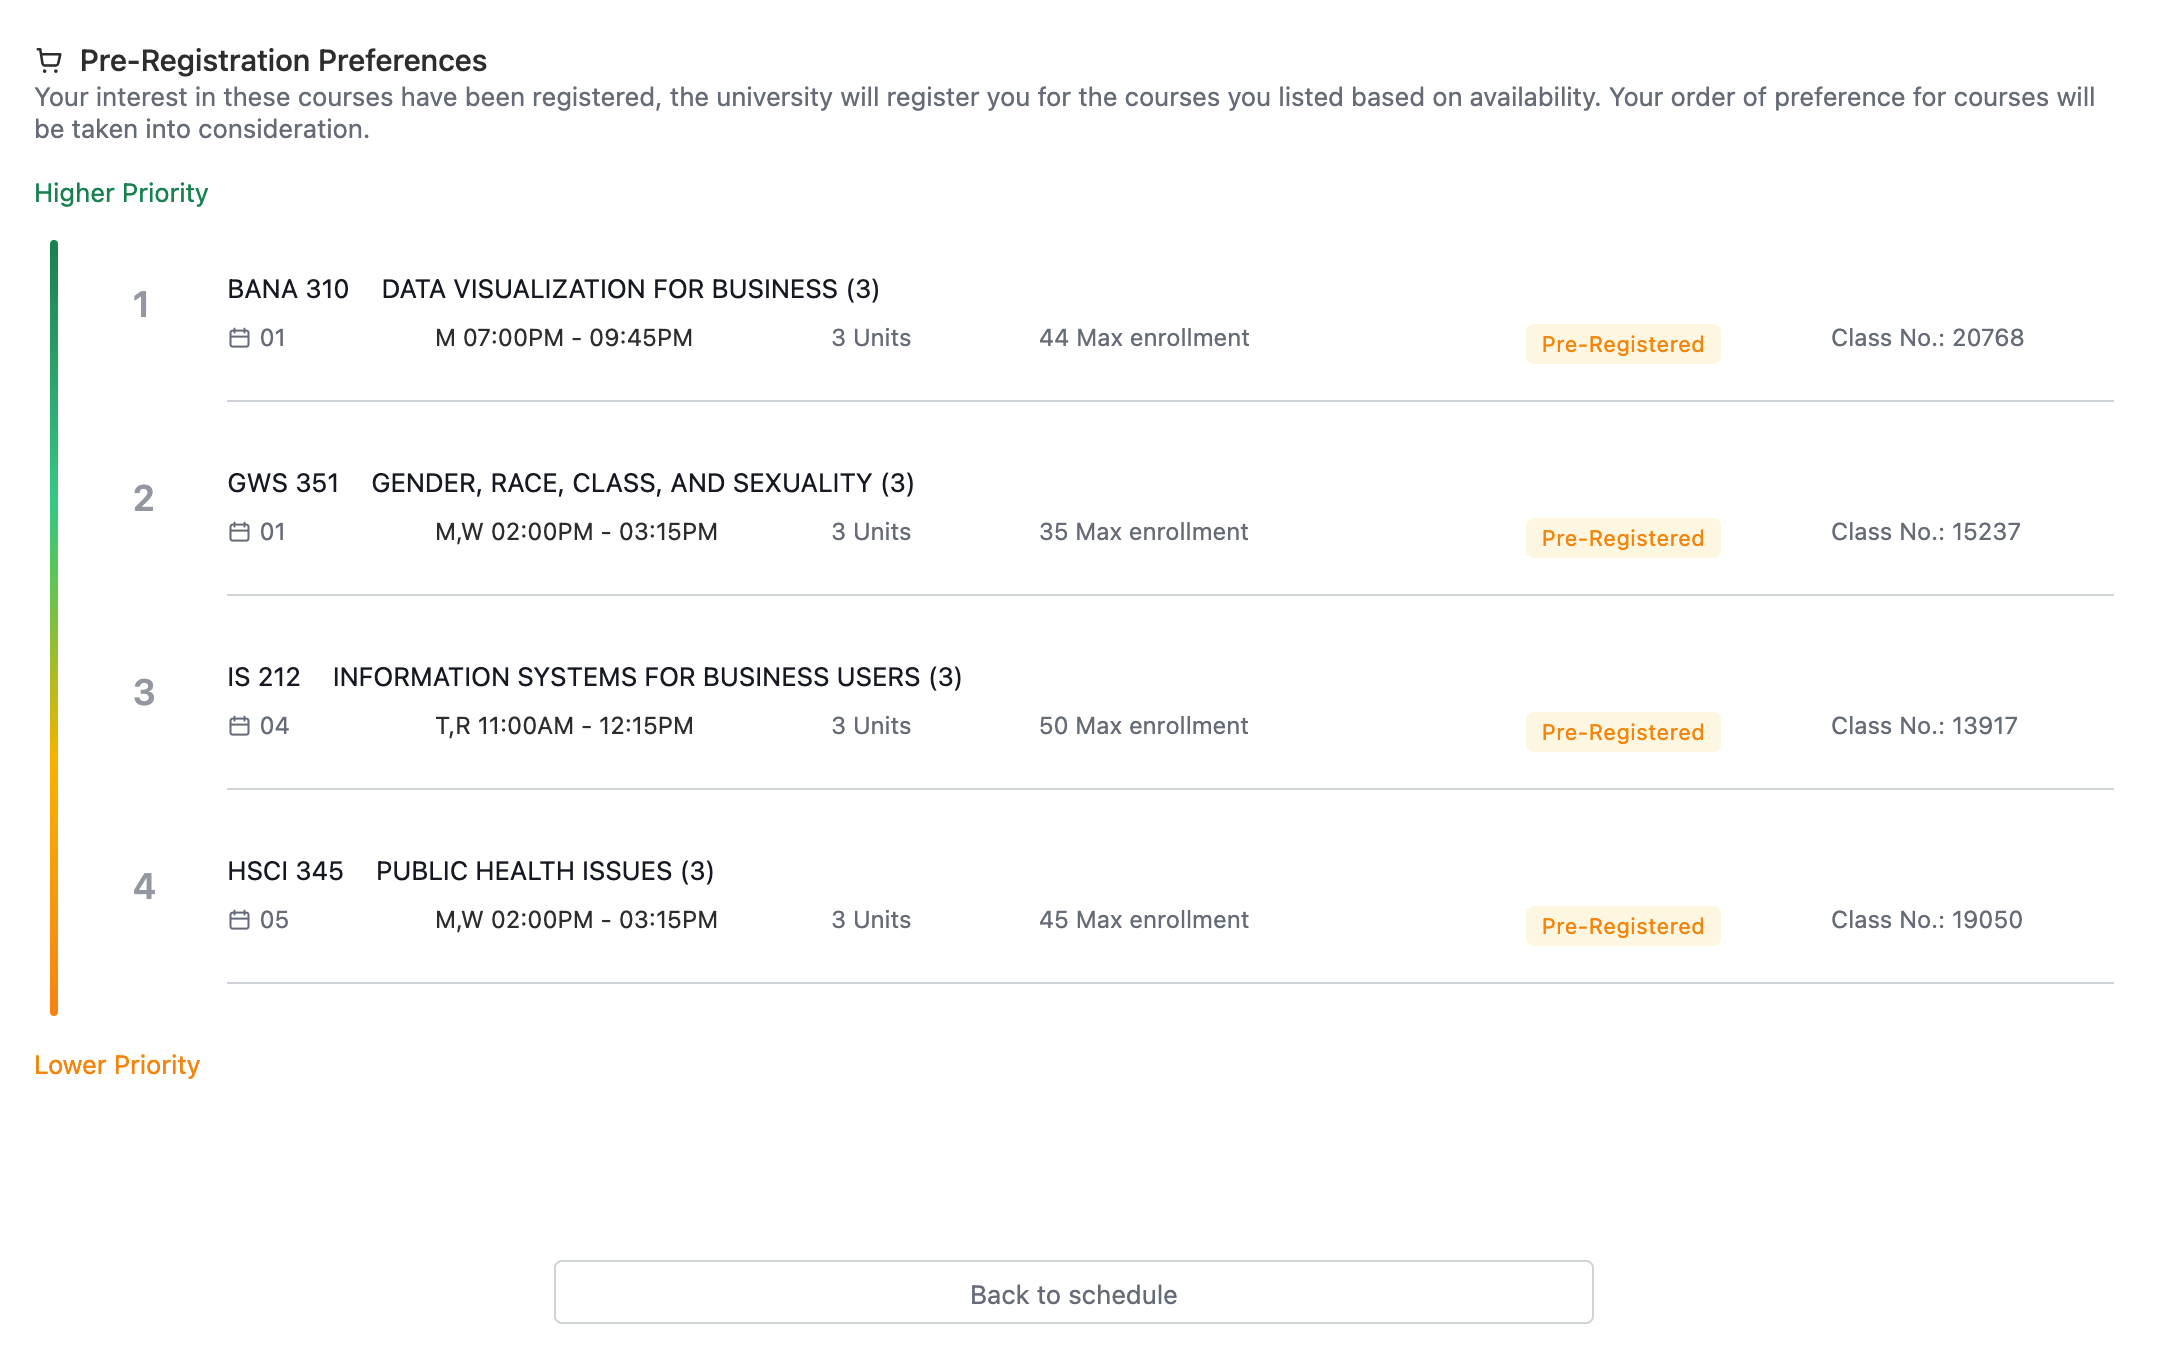
4. You can view your priority rankings on your courses within your planner or term schedule. You are able to change your choices up until the pre-registration deadline by selecting the "Update Courses for "Pre-Registration" button and going through the same steps listed above again. Make sure to submit your choices by once again clicking on the "Complete Registration" button to save your changes. 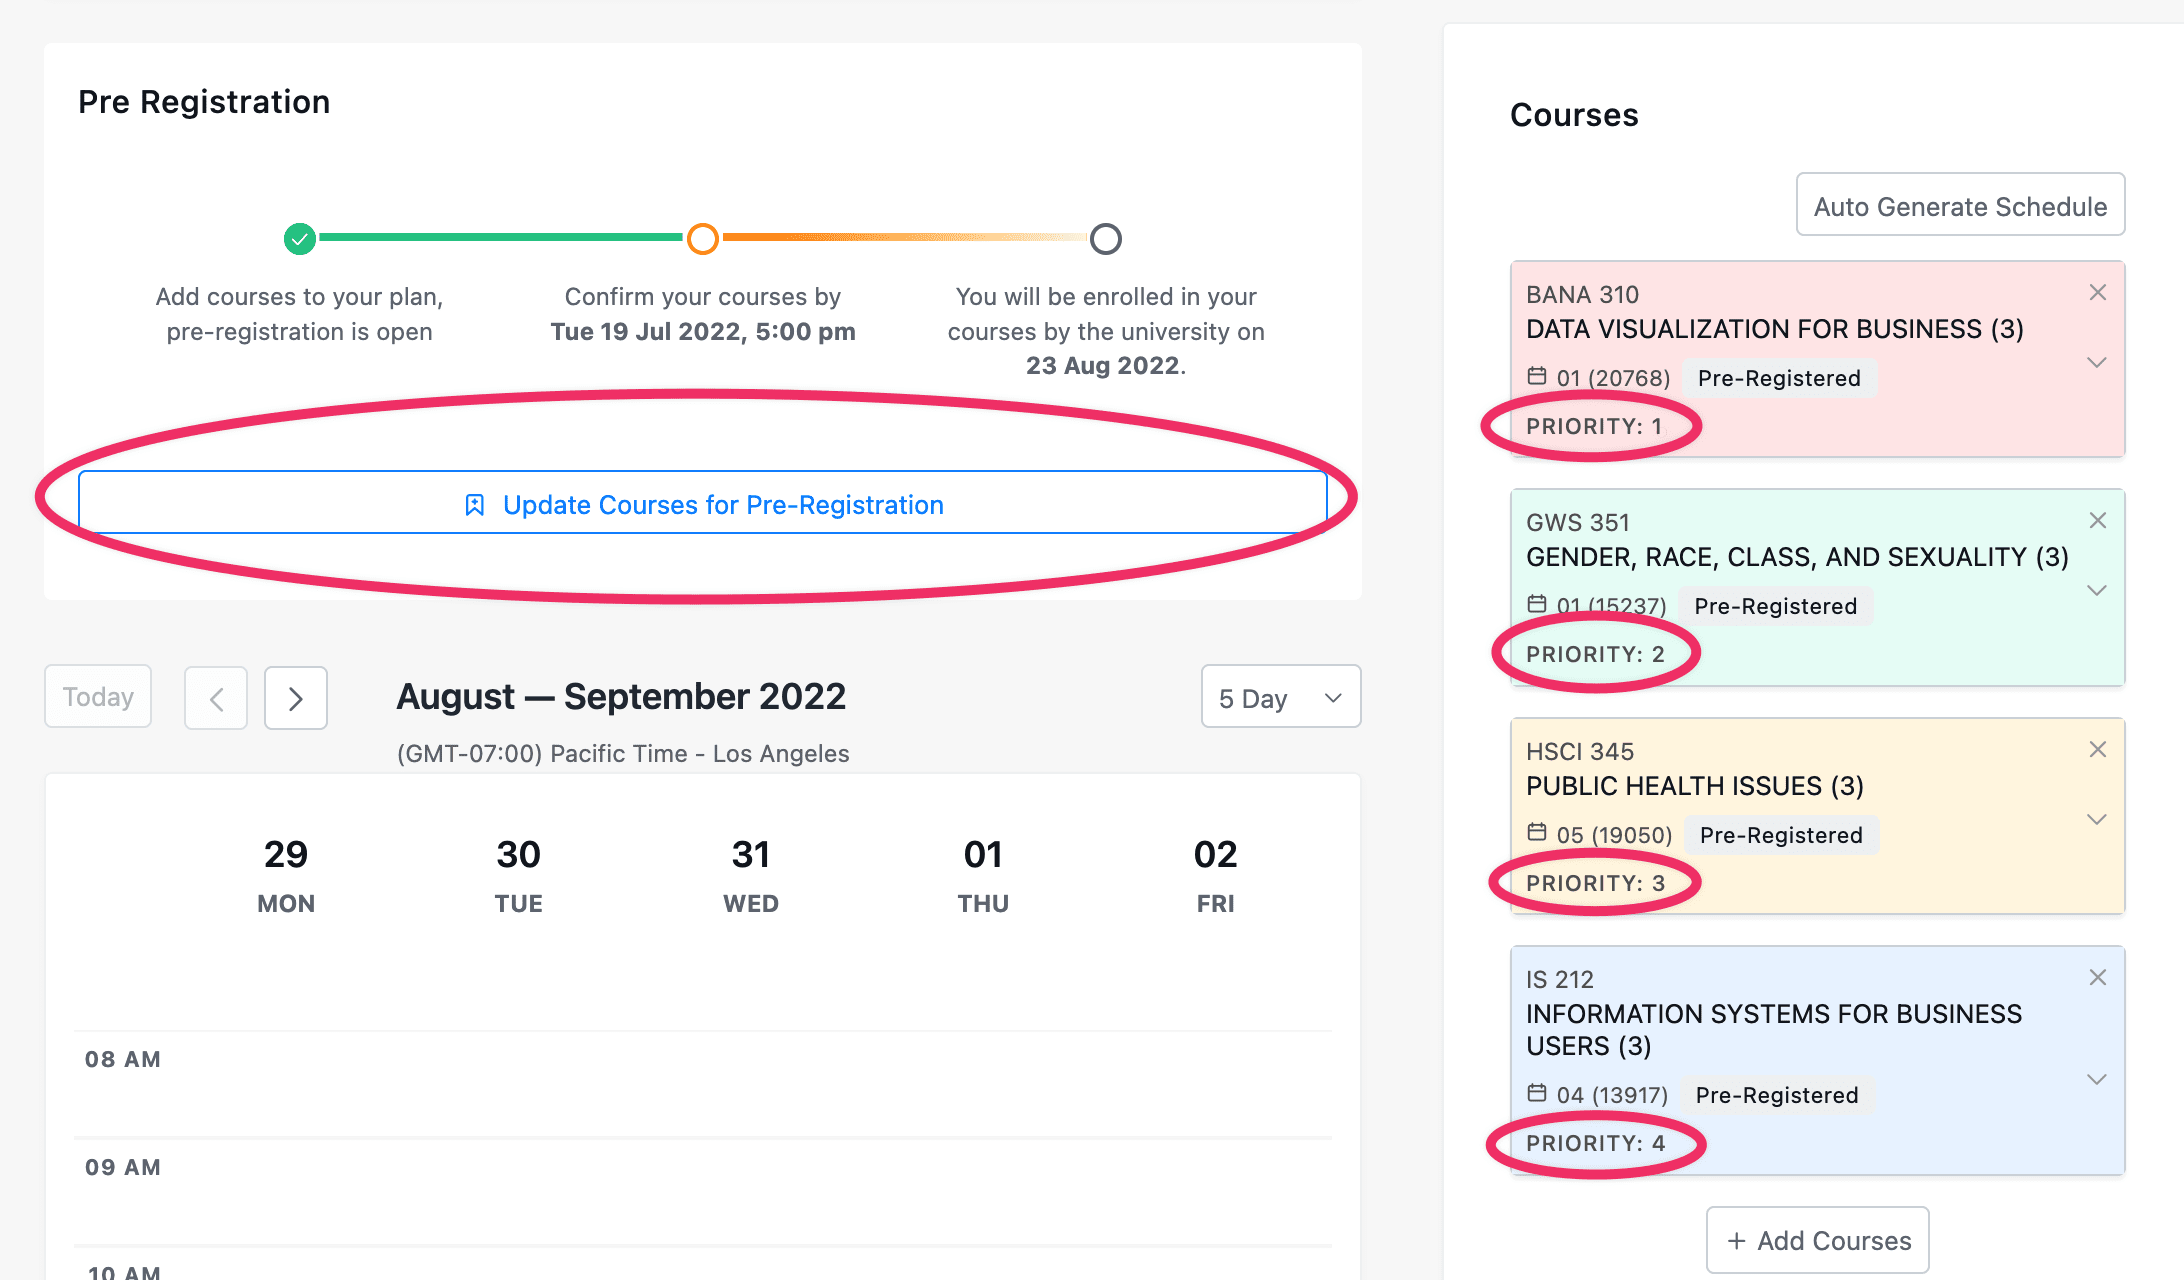
Note: Stellic will monitor how many students have confirmed a particular course section within their pre-registration cart. If the course section ends up being planned with at least 90% of its maximum capacity, a warning will appear to let you know that you may not end up getting your top pre-registration choice. In the example below, the lecture for CORE 101 has been added to at least 288 (90% of the max enrollment) students' pre-registration carts, so the "In High Demand" label appears to indicate that the section may be full, or even over-registered. Similarly, at least 18 students have added section 1 of the course, which has a max enrollment of 20 students. 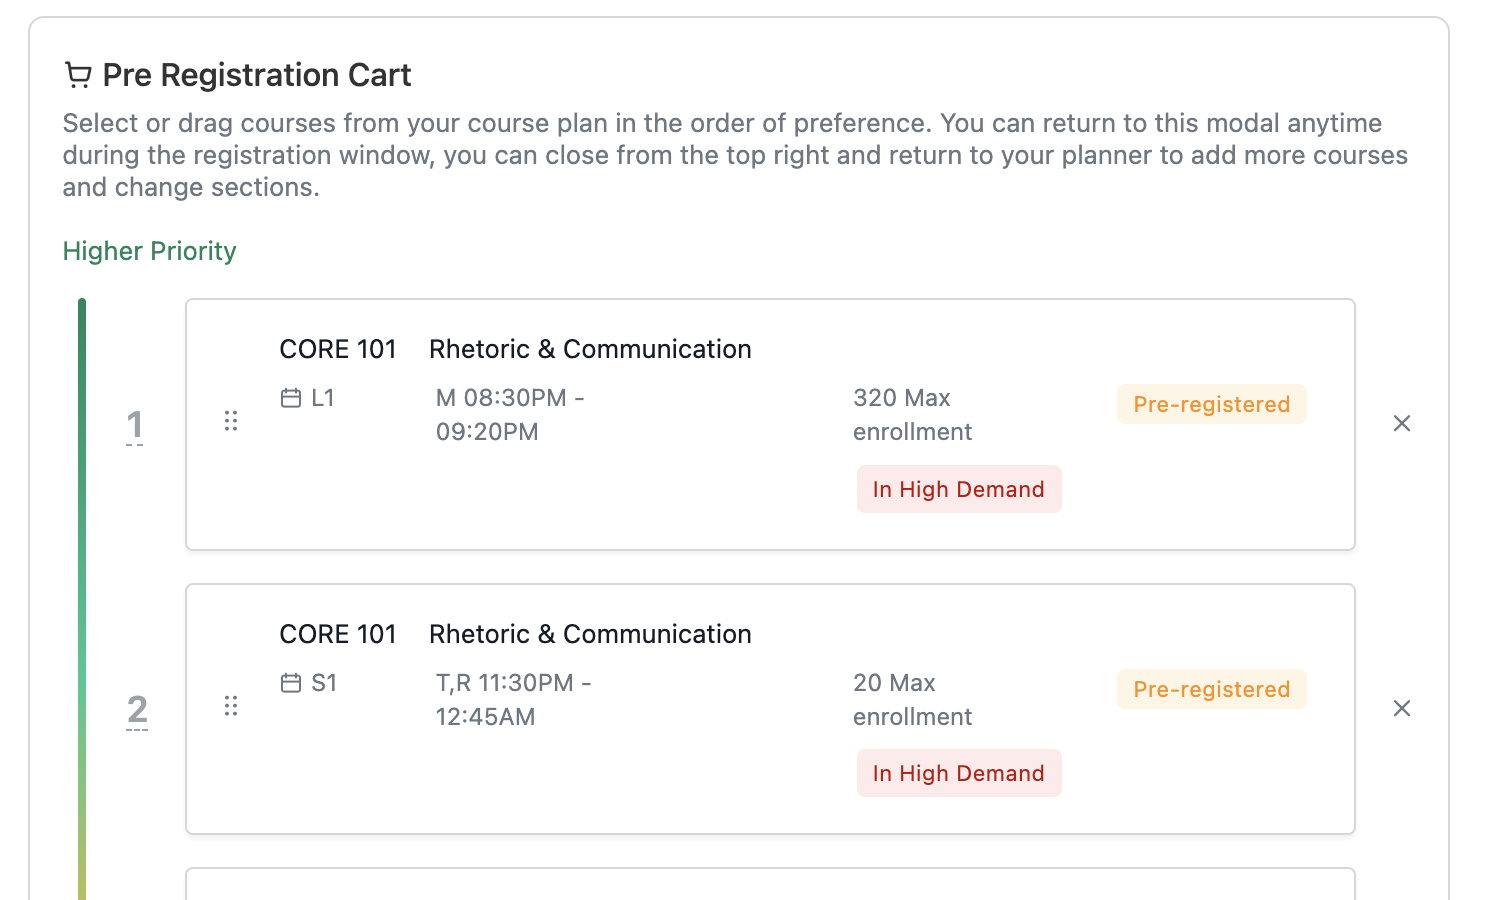
5. From here, your institution will take your course options into consideration when registering you for courses for the upcoming term. Note that pre-registration preferences are not officially registered courses - you will receive a notice once you have been registered for the term.
Preparing for pre-registration
1. If you have not done so already, add courses to your plan for the term. If you had previously added courses to your plan from the planner view, they will be present here in the schedule view. If you have not yet added courses, you can do so by clicking on "+ Add Courses" in the right sidebar. (If you need help navigating the course search, please visit our article on finding courses.) 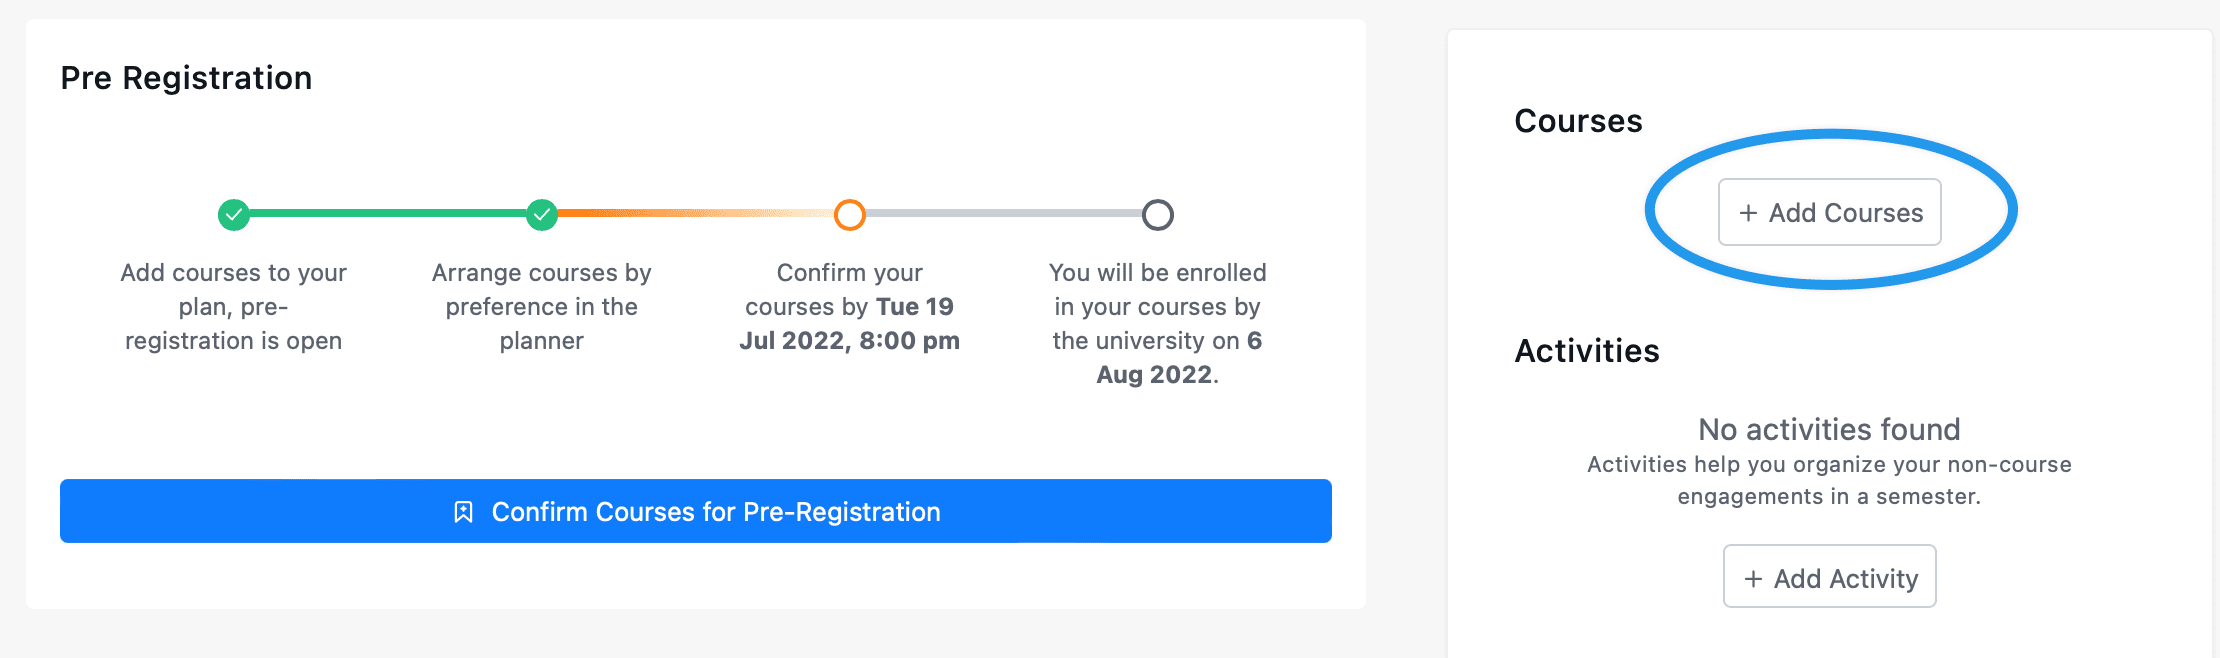
2. You will need to select a section for each course for which you want to pre-register. As you hover over the various sections available for each course, if a timing has been listed it will appear in your calendar view so that you can compare the timing to other courses or events in your schedule. Clicking on a section will add it to your schedule plan.
3. Once you have added a section for each course (you may add the same course more than once if you have multiple sections for which you are interested in pre-registering), proceed to the top of the page and click on the "Confirm Courses for Pre-Registration" button. (If you forgot to select a section for any of your courses, you'll be prompted again to add the section once you click the button). This will take you to the pre-registration widget where you can rank your courses.